

Architecture has always fascinated me. I have a few clients that I photograph houses for when I’m not on the road teaching. I appreciate the design aspects of good architecture and interior design, and I enjoy the challenge of finding the best angles to showcase the designers’ work.
With modern cameras and software it is relatively easy to balance exposure. Many times I can get everything I need from a single RAW file from my Olympus E-M1X or E-M1 mark III. When the dynamic range is too great for one shot, Adobe Lightroom has an HDR tool under the Photo Merge menu that does a nice job of producing a realistic image from your bracketed exposures.
Perhaps the biggest challenge of photographing interiors is balancing color in mixed light. Natural light through a window has one color temperature (or white balance). Inside you may have all manner of bulbs or tubes that give you who-knows-what color temperature, and it’s your job to make all of these colors look natural together.
You can make adjustments in Lightroom using the adjustment brush or gradient tools, but I handle this particular issue using layers in Photoshop. Let me show you how I go about it.
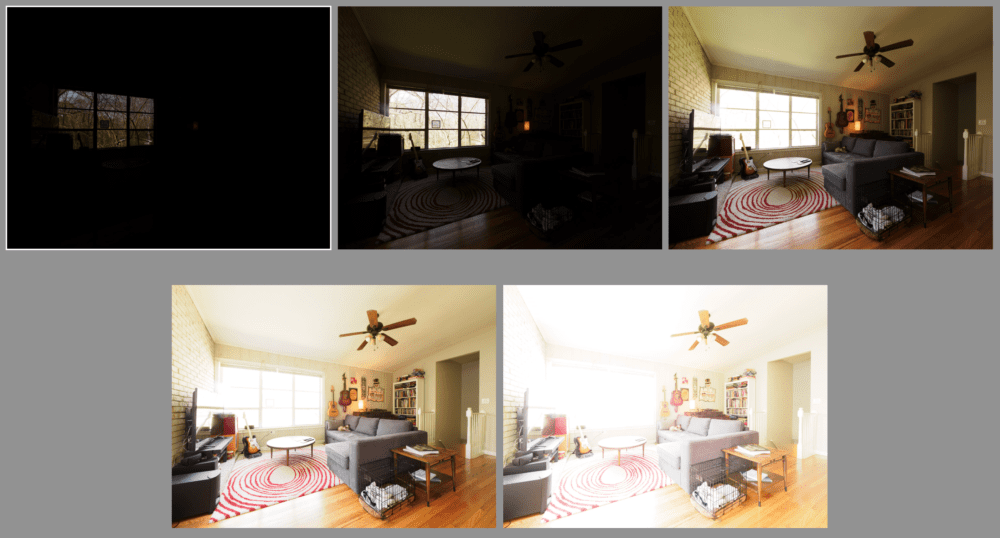
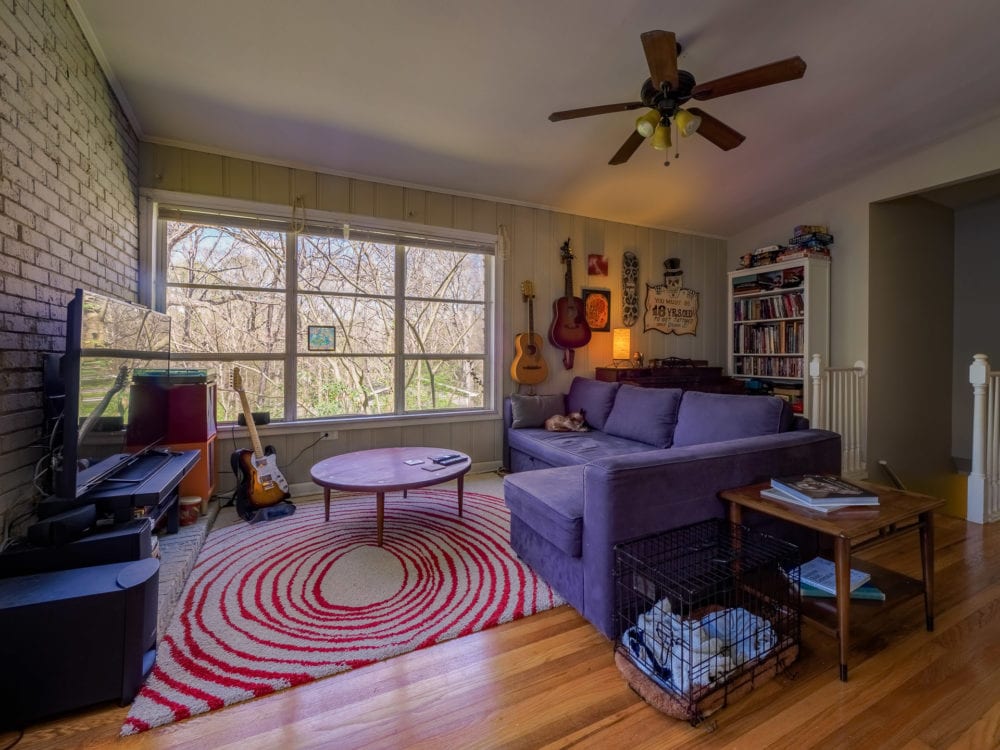
For this particular shoot (in my living room) I had my m.zuiko 7-14mm f2.8 pro lens on my E-M1 mark III. The camera was in manual exposure mode. I focused on the center of the scene then switched the camera to manual focus. I made five different exposures for different areas of brightness in the scene using the on-screen histogram as my guide. All of the exposures were at f8, ISO200, and I changed the shutter speed to adjust the exposure.
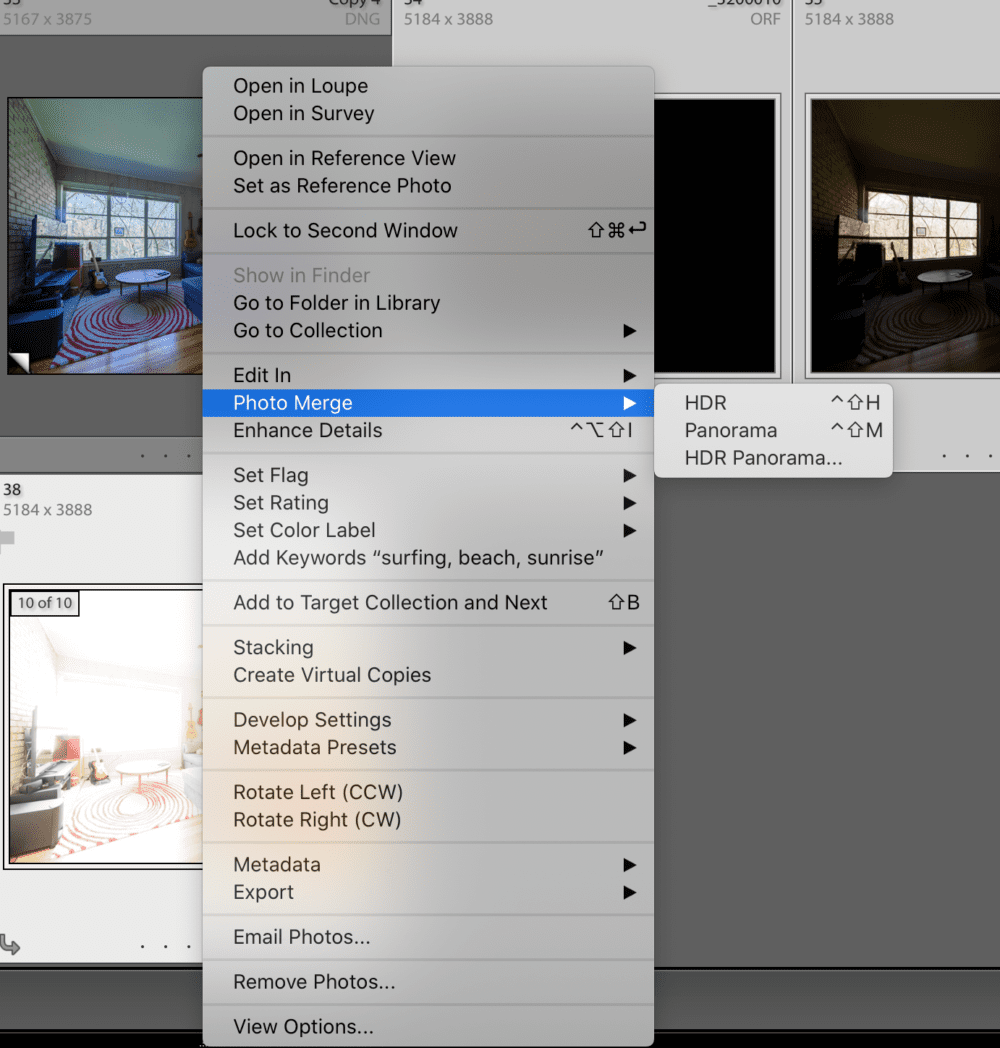
Once I loaded the images into my Lightroom catalog I selected my five source files in the Library module, then I right click on one of the images and go to Photo Merge> HDR…
This brings up the HDR dialog. I checked Auto Align and Auto Settings, and I selected None for the Deghost Amount since there is no movement in the scene. When I have everything checked I hit Merge at the bottom of the window.
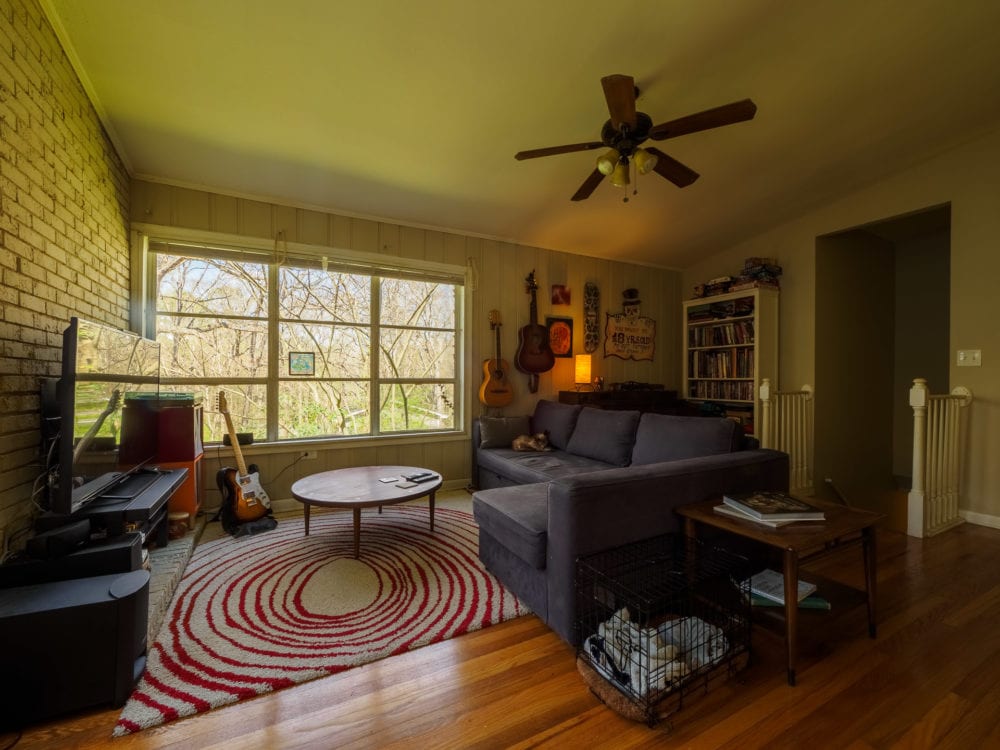
When the process is finished I take the resulting DNG file into the Develop module to adjust the exposure to my liking. Even though I can get the exposure pretty well dialed in, I need to do something to balance the many different color temperatures in the image.
My next step is basically to create a separate image for each area where the color temperature is different. First I set the white balance for the original HDR DNG file, then I press command/control ‘ to create a virtual copy. A virtual copy is a new set of instructions for the same file. Using the white balance eyedropper in the Develop module I select the white balance for an area of the virtual copy where the color is off. In this case I clicked on the white ceiling. I press command/control ‘ again to create another virtual copy and repeat the process with the white balance eyedropper in a different area.
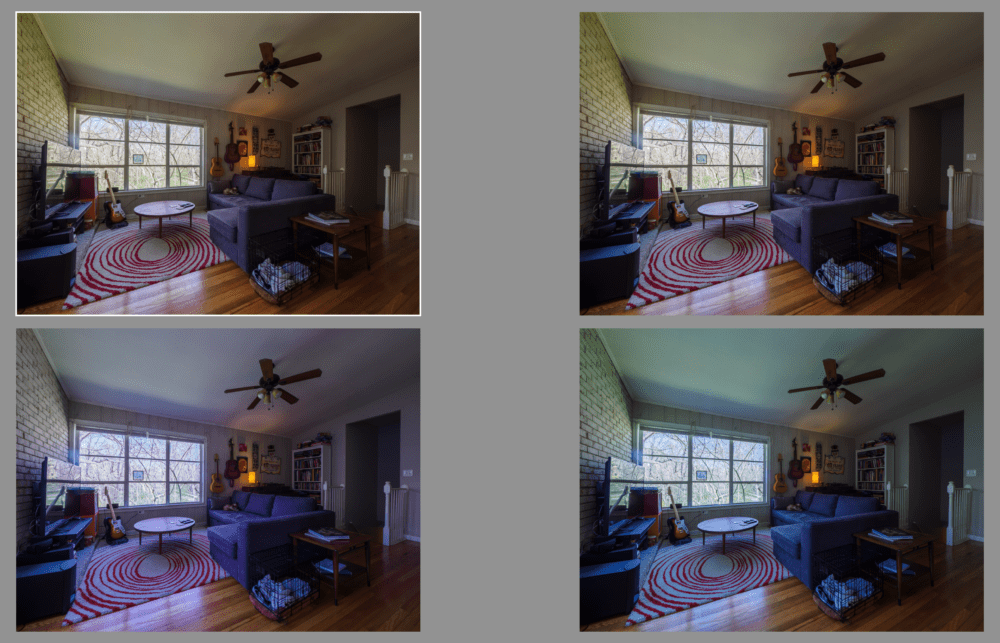
In this case I ended up with four different virtual copies to cover the different areas of color temperature in the scene. I selected the virtual copies in the Library module, right click one one of the images, and select Edit in> Open as Layers in Photoshop.

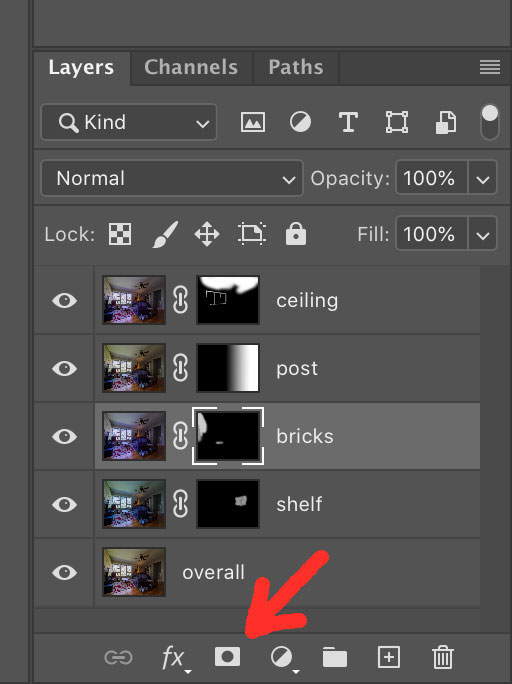
Once in Photoshop you will see your stack of images in the Layers panel. I went through and named my layers so I could keep track. You’ll select one of the layers and drag it to the top of the Layers stack, then hold option/alt and click the Layer Mask Icon (see figure 06) to create a layer mask and hide the layer.
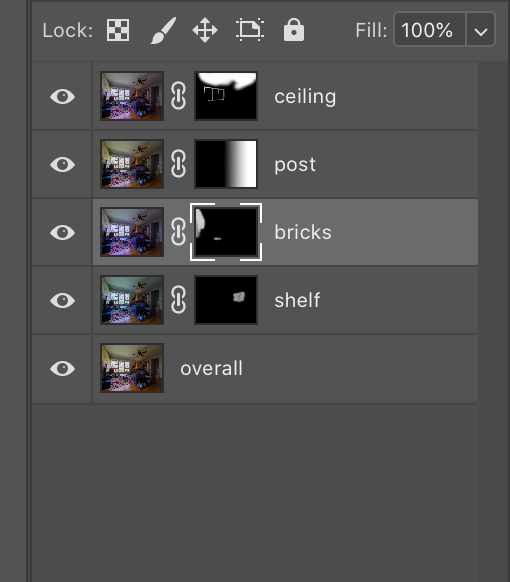
Click on the black layer mask then select the brush tool. Choose white paint and a soft brush at 50% opacity, then paint in the area where the color looks good. In this case I started with the image that has the correct white balance for the ceiling. I put it on top of the Layers stack, covered it with a black layer mask, then painted in the ceiling. I did this with each file until the color looked balanced. You can see how each layer has a different layer mask to reveal the color for that particular section of the image.
Once you’re done editing the layers you simply choose Save in the File menu and Photoshop will save your work and put it into your Lightroom catalog with the original files. This whole process took me less than fifteen minutes. It definitely took longer to write about than to actually do 😉 The finished image looks pretty much like the scene looked to my eye, and it doesn’t have any distracting color casts.

0 Comments